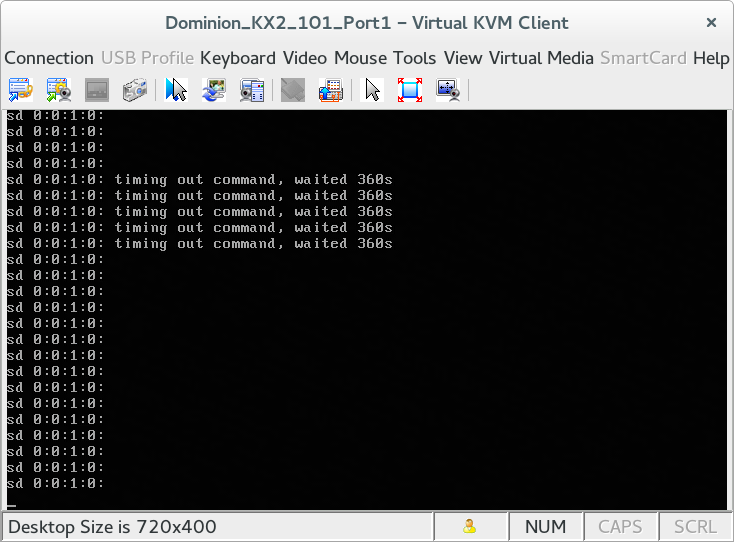
A “special snowflake” system that I’m responsible for was configured with two SAS disks in mdadm raid1 arrays. Multiple times over the course of a few years the system would essentially dead lock (still responding to ICMP echo requests) and print errors on the console about I/O errors to [0:0:1:0]. There would be no other response on the console and this state would persist until forcibly power cycled via switched PDU. Upon a boot and a fsck cycle the system would be back in an apparently normal state.
This system literally resides in the opposite hemisphere of where [I normally] am, complicating troubleshooting for hardware problems. [0:0:1:0] maps to /dev/sdb and that SAS drive never displayed unusual error counts (while the system was in a working state anyways). It always passed smart “long” tests so it wasn’t possible to determine if it was a failing disk, a failing controller/port, or some sort of kernel issue. I decided to add a 3rd disk sdc (that happened to already be in the system) into the raid1 array sets as a precaution against total disk failure. The the lockup issue reoccurred at least twice after the raid1 arrays were expanded to encompass 3 drives (warm fuzzies for software RAID…). After the most recent occurrence, sdb finally (!!!) failed a smart test.
# smartctl -a /dev/sdb
smartctl 5.42 2011-10-20 r3458 [x86_64-linux-2.6.18-348.6.1.el5] (local build)
Copyright (C) 2002-11 by Bruce Allen, http://smartmontools.sourceforge.net

Vendor:               SEAGATE
Product:              ST3146356SS
Revision:             0009
User Capacity:        146,815,737,856 bytes [146 GB]
Logical block size:   512 bytes
Logical Unit id:      0x5000c5002402db33
Serial number:        3QN44R1P00009103VVUL
Device type:          disk
Transport protocol:   SAS
Local Time is:        Thu Nov 20 16:45:44 2014 CLST
Device supports SMART and is Enabled
Temperature Warning Enabled
SMART Health Status: OK

Current Drive Temperature:     36 C
Drive Trip Temperature:        68 C
Elements in grown defect list: 6
Vendor (Seagate) cache information
  Blocks sent to initiator = 373711492
  Blocks received from initiator = 1186088917
  Blocks read from cache and sent to initiator = 7176963
  Number of read and write commands whose size <= segment size = 12639304
  Number of read and write commands whose size > segment size = 0
Vendor (Seagate/Hitachi) factory information
  number of hours powered up = 33608.63
  number of minutes until next internal SMART test = 6

Error counter log:
           Errors Corrected by           Total   Correction     Gigabytes    Total
               ECC          rereads/    errors   algorithm      processed    uncorrected
           fast | delayed   rewrites  corrected  invocations   [10^9 bytes]  errors
read:     872583        0         0    872583     872583        191.340           0
write:         0        0         0         0          1        609.094           0
verify:     1773        0         0      1773       1773          0.000           0

Non-medium error count:        3

[GLTSD (Global Logging Target Save Disable) set. Enable Save with '-S on']

SMART Self-test log
Num  Test              Status                 segment  LifeTime  LBA_first_err [SK ASC ASQ]
     Description                              number   (hours)
# 1  Background long   Failed in segment -->       -   33515           1027100 [0x3 0x11 0x0]
# 2  Background long   Completed                   -   27975                 - [-   -    -]
# 3  Background long   Completed                   -   22361                 - [-   -    -]

Long (extended) Self Test duration: 1740 seconds [29.0 minutes]
Since there were already two good disks in raid1 arrays, and invoking remote hands always carries some element of risk, I decided to remove the disk from the mdadm arrays and leave it installed but unused. I had never permanently reduced the size of a mdadm or device-mapper array and it took some fiddling to figure out how to accomplish this.
This is what the mdadm arrays initially looked like (I’d edited out some unrelated arrays):
$ cat /proc/mdstat
Personalities : [raid1]
md0 : active raid1 sdc1[2] sdb1[1] sda1[0]
      513984 blocks [3/3] [UUU]

md5 : active raid1 sdc2[2] sdb2[1] sda2[0]
      36861056 blocks [3/3] [UUU]

md4 : active raid1 sdc5[2] sdb5[1] sda5[0]
      16386176 blocks [3/3] [UUU]

md1 : active raid1 sdc6[2] sdb6[1] sda6[0]
      12586816 blocks [3/3] [UUU]

md3 : active raid1 sdc7[2] sdb7[1] sda7[0]
      1020032 blocks [3/3] [UUU]

md6 : active raid1 sdc8[2] sdb8[1] sda8[0]
      45287104 blocks [3/3] [UUU]

md2 : active raid1 sdc3[2] sdb3[1] sda3[0]
      30716160 blocks [3/3] [UUU]

unused devices:
As you would when replacing a drive, you need to fail and remove the appropriate block devices.
mdadm --manage /dev/md0 --fail /dev/sdb1
mdadm --manage /dev/md5 --fail /dev/sdb2
mdadm --manage /dev/md4 --fail /dev/sdb5
mdadm --manage /dev/md1 --fail /dev/sdb6
mdadm --manage /dev/md3 --fail /dev/sdb7
mdadm --manage /dev/md6 --fail /dev/sdb8
mdadm --manage /dev/md2 --fail /dev/sdb3

mdadm --manage /dev/md0 --remove /dev/sdb1
mdadm --manage /dev/md5 --remove /dev/sdb2
mdadm --manage /dev/md4 --remove /dev/sdb5
mdadm --manage /dev/md1 --remove /dev/sdb6
mdadm --manage /dev/md3 --remove /dev/sdb7
mdadm --manage /dev/md6 --remove /dev/sdb8
mdadm --manage /dev/md2 --remove /dev/sdb3
At this point I was into uncharted territory. I wanted to make sure that sdb would not be reincorporated into the array set as part of auto assembly so I nuked the superblocks.
mdadm --zero-superblock /dev/sdb1
mdadm --zero-superblock /dev/sdb2
mdadm --zero-superblock /dev/sdb5
mdadm --zero-superblock /dev/sdb6
mdadm --zero-superblock /dev/sdb7
mdadm --zero-superblock /dev/sdb8
mdadm --zero-superblock /dev/sdb3
# cat /proc/mdstat
Personalities : [raid1]
md0 : active raid1 sda1[0] sdc1[2]
      513984 blocks [3/2] [U_U]

md5 : active raid1 sda2[0] sdc2[2]
      36861056 blocks [3/2] [U_U]

md4 : active raid1 sda5[0] sdc5[2]
      16386176 blocks [3/2] [U_U]

md1 : active raid1 sda6[0] sdc6[2]
      12586816 blocks [3/2] [U_U]

md3 : active raid1 sda7[0] sdc7[2]
      1020032 blocks [3/2] [U_U]

md6 : active raid1 sda8[0] sdc8[2]
      45287104 blocks [3/2] [U_U]

md2 : active raid1 sda3[0] sdc3[2]
      30716160 blocks [3/2] [U_U]

unused devices:
However, at this point the arrays all show that one of 3 “blocks” was missing. It’s a bit counter-intuitive naming but the --grow mode also allows you to “shrink” an array.
mdadm --grow /dev/md0 --raid-devices=2
mdadm --grow /dev/md5 --raid-devices=2
mdadm --grow /dev/md4 --raid-devices=2
mdadm --grow /dev/md1 --raid-devices=2
mdadm --grow /dev/md3 --raid-devices=2
mdadm --grow /dev/md6 --raid-devices=2
mdadm --grow /dev/md2 --raid-devices=2
And now we have a set of healthy mdadm raid1 arrays composed of partitions on only sda and sdc. Since there should be virtual no read or write activity to sdb except when being probed, hopefully the SCSI I/O deadlock problem will not reoccur until the disk can be physically removed (or more likely, the entire chassis replaced).
# cat /proc/mdstat
Personalities : [raid1]
md0 : active raid1 sda1[0] sdc1[1]
513984 blocks [2/2] [UU]

md5 : active raid1 sda2[0] sdc2[1]
36861056 blocks [2/2] [UU]

md4 : active raid1 sda5[0] sdc5[1]
16386176 blocks [2/2] [UU]

md1 : active raid1 sda6[0] sdc6[1]
12586816 blocks [2/2] [UU]

md3 : active raid1 sda7[0] sdc7[1]
1020032 blocks [2/2] [UU]

md6 : active raid1 sda8[0] sdc8[1]
45287104 blocks [2/2] [UU]

md2 : active raid1 sda3[0] sdc3[1]
30716160 blocks [2/2] [UU]

unused devices:
2015-03-04 at 02:05
Very useful, thanks!